How do I create an Excel file for import?
Create an Excel file where each column represents a word field.
The Excel or CSV file must contain at least these columns: Native language, Learning language.
Optional columns: Transcription, Examples, Gender (for each language).
The app supports 3 types of tables:
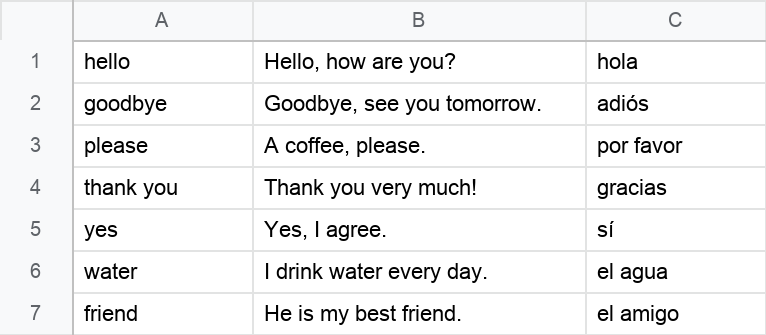
1. Plain words list
Download template
Input: plain words list (optional columns are supported).
Result: a top category with the name of the file.
Tip: if you put a header row in the table, this row will be imported as the first word.
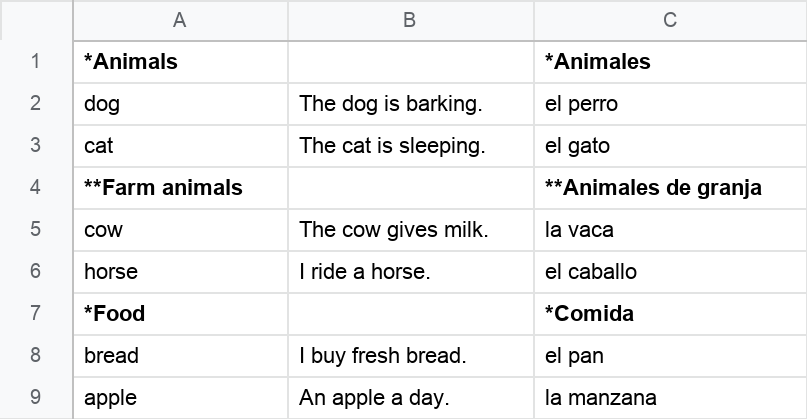
2. Words list with subcategories
Download template
Input: words separated by subcategories.
Subcategories: subcategories are marked with an asterisk (*), sub-subcategories are marked with two asterisks (**).
Result: a top category with the name of the file (with subcategories inside).
Tip: subcategory names from the table will be used as subcategory names in the app.
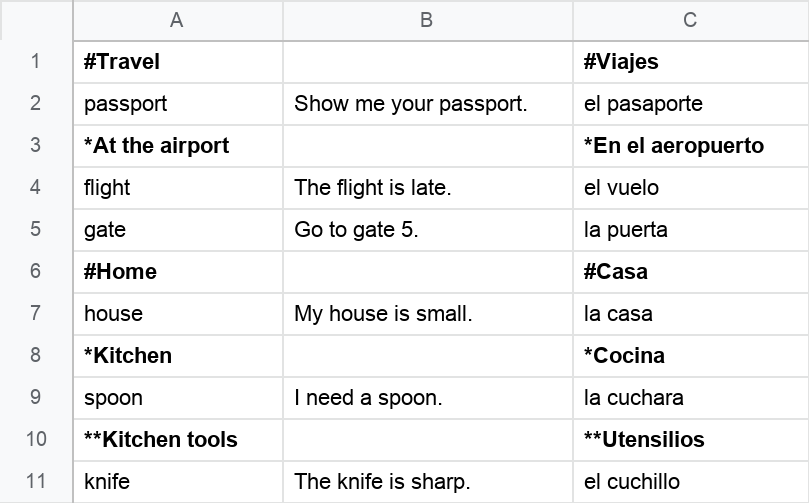
3. Words list with top categories and subcategories
Download template
Input: top categories with subcategories and words inside.
Top categories: top categories are marked with a hash sign (#).
Sub-categories: subcategories are marked with an asterisk (*), sub-subcategories are marked with two asterisks (**).
Result: top categories with the names from the file (with subcategories inside).
Tip: top category and subcategory names from the table will be used as category names in the app.
Save the file in .xlsx or .xls format and copy it to your device.
You may also find these articles helpful: